Pages

Sunday, December 25, 2011

Eggnog & Brandy Balls

Holiday Brandy-stravagansa

I don't know about you, but for me holidays can be stressful times. Traveling to be with your loved ones, being with your loved ones, having to talk to your loved ones — all of these things are leading stressors that, when combined with the general blahs of a season without the sun, can really depress people.

Nothing cures depression like a depressant! If we have to spend our time in unpleasant familial obligations, we might as well get smashed.

Eggnog? More like Yay-gnog!

Because what are the holdiays if not an excuse to drink?

Okay, I'm playing up the booze angle here a bit but let me be frank: I effing love eggnog. No lie. Every year the delicious reappearance of eggnog has always been the high point of the holiday season. I even love the non-alcoholic kind you can buy in stores. For years this was my favorite seasonal drink.

Homemade eggnog blows that processed stuff out of the water.

Putting the Egg in Eggnog

We used four eggs in our nog, beating 1/3 cup of sugar into the yolks and putting the whites aside. The base was two cups of whole milk and a cup of half-and-half (though you can use anything up to heavy cream) seasoned with a teaspoon of nutmeg. Some people don't bother cooking their eggnog, but it's a general good practice whenever you're doing anything with eggs — Rocky Balboa notwithstanding.

We brought the milk mixture to a quick boil and combined it with the yolk-sugar. The trick is to to pour the hot milk into the yolks (not the other way around!) slowly enough to avoid accidentally cooking the yolks — something that would be pretty unpleasant. After you've combined the milk and eggs you'll want to slowly raise the temperature back to 160 F.

We used half a cup of brandy, but you could easily substitute rum. Not adding booze is an affront to Saint Nick. Set the whole thing into the fridge to just chill for a bit — a few hours will do the trick.

While the milk/yolk/booze is chilling you're going to want to whip the egg whites with an electric beater until they form soft peaks. Gradually add another tablespoon of sugar and keep beating until stiff peaks have formed. Once the milk/yolk/booze is cold, whisk the meringue into the milk mixture.

Chill With the Eggnog Already

Don't make the same mistake we did. After the whisking your eggnog will still be separated. If you drink it now, you'll have this weird head on top of watery nog that is still okay, but not great. We let the rest of it sit overnight, and discovered that it settled into an amazing drink if you just leave it alone for awhile. It was fresh, creamy, thick, and best of all, delicious.

Wrap Your Lips Around These Brandy Balls


Fun Fact: You can raise your blood alcohol level without drinking. Many recipes call for various amounts of potent alcohol, and not all of them burn off the "get you drunk" bits when cooking. For good reason, many of these sorts of recipes are used and consumed during the holidays.

Chocolate brandy balls are really good, and really strong.

Kill the Wabbit

This is another recipe that you can substitute rum for the brandy — if you're a complete philistine. The chocolate part of our brandy balls comes from crushed chocolate wafers. You're free to use vanilla wafers instead — if you're a total racist. We couldn't find the exact sort we wanted at the store, so we actually used some chocolate graham-cracker rabbit things, and it worked out just fine.

Anyway, you need chocolate crumbs, so we basically threw two-and-a-half cups of the rabbits into a ziplock bag and I wailed on them with the bottom of the measuring cup until they were all smashed up good. I'm good at the smashing.

Gently Roll Them In Your Hands

We also nuked a cup of chocolate chips until they were melted as a base, and into that we mixed the rabbit crumbs, 3 tablespoons of maple syrup, 1/2 cup of sugar, a cup of chopped nuts, and 1/2 cup of brandy. After chilling this stuff for about an hour, we hand rolled teaspoon-sized portions of this mixture into balls, then rolled the balls through a bowl of sugar to coat them.

Chill With the Balls Already

Now, maybe you have more patience than I do. Maybe you're a goddamn perfectionist saint. Maybe you can resist the allure of these delicious and potent chocolate morsels — if you can, you're a better man than I. Ideally you want to put the balls in an airtight container and chill them for from a few days to a few weeks to let them age — apparently, they only get better and better. I can't say, because Kat and I ate them all the next day, and they were pretty damn good.

Friday, December 16, 2011

Indian Tomato Lentil Stew

Improvisational Meal Planning

While you can certainly make it a point to decide what you're going to be eating for every meal every week, most people are fairly casual in their meal planning. A mood grips them, or fails to grip them, and they decide that to make dinner on an impulse out of whatever they happen to have around the home. Certain foods lend themselves well to that sort of improvisational meal planning, and Indian Tomato Lentil Stew is one of them.

Indian Tomato Lentil Stew

Stews in general make great improvisational meals. You can vary the ingredients depending on what vegetables are on hand, and switch up the quantity based on what you feel like eating. As such, please see the following as more of a guideline than a rule - stews are very personal meals.

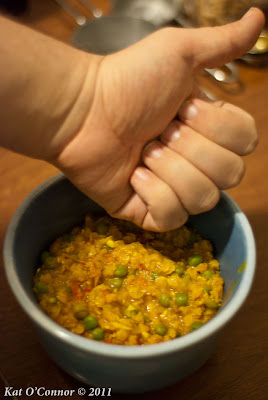
We started by sauteing an onion, a spicy pepper, and three minced cloves of garlic in a tablespoon of olive oil. We added this saute into three cups of water, along with a cup of chopped tomato and a cup of dried red lentils. The mixture was brought to a boil and then simmered until the lentils grew tender, which took us about an hour.


The Spice WILL Flow

After we were done simmering we added spices. Again, these can be adjusted to taste, but we used 3/4 teaspoon of turmeric, 3/4 teaspoon of ground cumin, and a half teaspoon of ground ginger. For color we added a cup of peas, and let the spices permeate and blend for another five minutes.


We served the stew over a bed of brown rice. The result was delicious and spicy, though if you wanted a bit more you are free to season with salt and fresh ground black pepper, though for the most part that's unnecessary.

Sunday, November 13, 2011

Chiles Rellenos

Or, How to Stuff a Pepper


Chiles Rellenos is a pretty simple recipe. The stuffing is made out of cooked brown rice, peas, corn, and mushrooms from the farmer's market stir-fried together with the same Apple Barbecue sauce we used in our No-Meat Loaf, and a little crumbled goat-cheese.

This is just one possible stuffing; you can pretty much just make it up as you go along. Quinoa and veggies works just as well, or salsa and cheese.

Packing the Peppers

Cut the stem off of a poblano pepper and scoop out the seeds, then stuff the rice mixture inside. Roast it in the oven until the pepper is tender, which is about 20 or 30 minutes at 350 degrees.

The side we've got pictured to the left are Dragon Tongue beans, steamed 10 minutes then tossed with a little olive oil, sea salt, and fresh ground pepper.

The result? A very balanced meal with just a bit of heat from the pepper, a touch of sweet from the apple barbecue sauce, a little tang from the goat cheese, all combining to complement the savory of the rice and veggies. Perfect.

Thursday, November 3, 2011

No-Meat Vegetarian Loaf

 I, personally, am not a vegetarian. I'm an omnivore. I eat meat. Not a lot, mind you – since my girlfriend is a vegetarian, I rarely if ever eat any at all these days. I suppose a better way to put it might be to say that while my diet is chiefly vegetarian, I myself am not. I don't really miss eating meat, and the less I eat the less I crave it, particularly when there are meat-ish dishes like this available.

This vegetarian meatless-loaf is healthy, hearty, and delicious. We use, as in most of our recipes, locally sourced ingredients. The base for our loaf is firm tofu purchased from Phoenix Bean. I never really liked tofu as a kid, but after tasting some of their demos at the farmer's market, they've really grown on me. We're also using previously cooked brown rice, bread crumbs, and shredded vegetables – a carrot, a beet, a small onion, and a jalapeno for a little kick, but you can basically use whatever veggies you have on hand. We're also mixing in chopped walnuts, and a few spices – garlic (or Dijon) mustard, soy sauce, and a few grinds of black pepper.

We're going to use barbecue sauce, both in the mix and atop the loaf. In this case we went with a surprisingly delicious apple barbecue from Hillside Orchards. Yes, we get a lot of good stuff from them.

Preparations for No-Meat Vegetarian Loaf

Preheat the oven to 350. While it's warming up, blend 16 ounces of tofu with a mixer until its achieved a smooth consistency, and mix in the spices – we used 2 tsp of the garlic mustard, 3 tsp of soy sauce, a quarter cup of the barbecue sauce, and just a few grinds of black pepper. You'll want to mix the chopped vegetables (one of each), walnuts (a cup), bread crumbs (2 cups), and brown rice (1 cup) together in a separate bowl.


Messy Fun – Without the Meat!

This is the fun part. Or the gross part. Probably a little bit of both, depending on your individual predilections. You're going to dump the vegetable mix into the tofu, and sort of squelch it all together with your hands, like you're making mud pies. This is messy. And cold. But it's gotta be done, so enjoy having your hands wrist deep in food that you're going to be serving later. I really wish I didn't have to remind you to wash your hands, but... yeah. Wash your hands first. And after.

Cooking the Meatless Loaf

Grease yourself up a baking pan, pack your goop into it, and top with a layer of barbecue sauce. Bake that sucker for an hour, and let it stand for about ten to fifteen minutes afterwards before serving.

What you end up with is a firm loaf of tofu, rice, and veggies that's good for you and very filling. The fact that it tastes great doesn't hurt too much either.


Bonus Round: Potatoes

As a side dish we cut some potatoes up into chunks and tossed them with olive oil, salt, and herbs (sage and rosemary, but you can use whatever). We let them bake on a baking sheet while the loaf was baking. Man, I love me some potatoes.


Do I miss meat? Heck, most days I don't even remember that I'm not eating any! What about you, readers? Have you gone vegetarian, or thought about it? Has it been difficult for you to make the transition?

By

Wednesday, October 26, 2011

Pumpkin Carving and Seed Spooktacular

Halloween has always been my favorite holiday. When I was a little kid it wasn't so much about the candy as it was about the dressing up and running around in the dark. As I got older, though, the tradition lost much of its luster – not because I was "growing up" or anything so trite and juvenile, but because the trick-or-treating was set earlier and earlier in the day out of community and parental fears.

It got less fun, and as it did Halloween parties and other activities became more fun. Pumpkin Carving has been one of those traditions that has never gotten any less fun. Like cooking, it can be a friendly and intimate social activity.

Pumpkin Carving

Some people just start cutting on a pumpkin freestyle, but I like to give myself an idea of what I'm working with ahead of time. Using a sharpie I drew on what I hoped was a spooky face. Pumpkins are porous so whatever you draw on it ain't coming out if you decide to cut something a little different, but really in the dark nobody can tell.


If you're stumped for ideas or just not artistically minded you can find pumpkin carving templates all over the internet. These are basically stencils and patterns you can use when carving.

After you've planned out your carving g'wan and cut a circle in the top of the pumpkin, around the stem, and scoop out the guts. You can use a spoon if you're squeamish but really just reach your hand on down in there and tear it out by the handful.

Have your lovely assistant pick the seeds out of the pulp while you get on with the scooping and carving. Like I mentioned earlier, carving is an opportunity for a fun social communal activity – the more people you get involved the better, and Lovely Assistants are always appreciated.


While they toil at separating the seeds, you can commence with the actual carving out of the face you'd drawn on earlier. You'll want to carve out the pumpkin's inner flesh with a spoon until the shell is about an inch thick all the way around.


Using a Pumpkin Carving Template

If you're using a template from the internet you'll want to print it out and pin or tape it to the pumpkin's face. If you don't have a nice flat surface to work with you can soak the printout in vegetable oil to make it mold easily to the surface you're working with, or just make minor tears in the paper as required. Once its affixed, you're going to create guidelines in the pumpkin's surface with the pin wherever you think will help you out. The general idea is to remove the paper and then play connect-the-dots with the carving knife.

We have no photos of this because we true artistes would NEVER resort to using a stencil when working in the medium of gourd.

Pumpkin Seeds

When you're done you'll have a lot of leftover material – pumpkin flesh, seeds, and the stringy membrane the seeds are suspended in. You can just toss the membrane, but the seeds and flesh can be eaten. There are a ton of recipes out there for using the flesh – make a pie – but what I like to do with the seeds is roast them, almost as part of the carving process.

While you're carving, your Lovely Assistants can rinse out the pumpkin guts to get any leftover membrane off of the seeds. When they're clean you want to boil them in salt water and let them simmer a good ten minutes to infuse them – 2 cups of water and a half tablespoon of salt to every half-cup of seeds. We ended up with a cup of seeds, so that's 4 cups of water and a tablespoon of salt.

After they've simmered coat a pan with a tablespoon of olive oil and spread the seeds out in a single layer in it. Roast them at 400 degrees for about 20 minutes or until a nice brown. We added in chunks of pumpkin flesh as well, and they came out very tender and pumpkin-y.

The seeds, once roasted, make a great traditional snack that can be shared and enjoyed as part of the overall process. There are a lot of other uses for your pumpkin's leavings; do you have any to share with us?


Tuesday, October 18, 2011

Burritos!

I don't know about you, but I love Mexican food. Part of it is the whole spicy-to-the-edge-of-pain thing, but really what I like are solid practical ingredients mixed together in ways that just happen to taste amazing. Burritos are a good example of this.

When you think about it, all a burrito is is a bunch of food wrapped up in a flour casing. I'm not sure exactly what it is, but somehow when you're eating a burrito it becomes much more than that. Something with a deep resonance to the psyche. I think burritos are some sort of universal comfort food. Of all the various forms of fast-food you can get, I feel the least guilty about eating burritos. Even so, homemade they're simply amazing.

Today our burrito is going to contain the following:

Guac

We're making our Burritos with guacamole. We grab our avacado and mash it up with a splash of lemon or lime juice for a little zing, and mix in chopped tomato and red onion. We give a few grinds of sea salt into the mix, and while it's optional I really recommend adding some chopped fresh cilantro.


Rice

Much of the 'meat' of the burrito is going to be rice, cooked normally and then fluffed with a fork. After it steams for awhile we'll add in some more lime juice and chopped cilantro.


Beans

We're going to rinse a can of black beans, and then add chopped mushrooms and Hungarian sweet peppers. After that we mix in some coriander, cumin, a dash of cinnamon, and a dash of cayenne pepper. This bean mixture will be nuked in the microwave before being served.

Salsa

This time we ended up using a premade salsa, but I've got a good excuse. It was an amazing cherry chestnut salsa from Hillside Orchards. Really. I know, I was like "Cherry salsa, Kat? I dunno..." but she was 100% right on this, and you should definitely give some a taste.

It all turned out really well. We warmed up (almost toasted) the tortillas before serving, added in some Mexican-blend cheese, and voila!


Monday, October 3, 2011

The Community of the Farmers' Market

I've written before about how the farmers' market becomes a community. The foundation of a community is, of course, its people. I return to the market week after week, see the same people, have conversations, make friends. Advice on what to make for dinner, or shared excitement at a personal achievement — these are stories shared and connections made that build this community.

Vera and I have been friends since the early days of the market. She and I have a shared interest in the arts. She always asks after my current projects. She herself is a writer and crafter; in addition to unusual vegetables, she farms, spins, and dyes her own woolen yarn, and knits one-of-a-kind fashions. She has a hand in the creative process from sheep to skirt.

She has been one of my main go-to resources for food and cooking ideas, and has encouraged me to be a little more experimental in my cooking. It's because of her that I first tried cooking with lavender... and then proceeded to spend that entire summer putting lavender in everything. Lavender scones, lavender lemonade, lime-lavender granitas, lavender cinnamon rolls (a failed experiment due to a bad dough recipe), and even honey-lavender ice cream (which was amazing).

I'm still getting the hang of flavoring with herbs, but if I have questions about her lavender, sage, or fennel, I know I'll get good advice from her.

Susie always greets me with a smile and cheerfully offers free samples of every kind. Her company, Phoenix Bean, is responsible for some pretty amazing tofu products. She is also a great resource for recipe ideas, which then allow me to further experiment; I got the idea for the tofu noodle salad from the recipe cards available at her booth, but I've been able to spin endless variations on that basic theme.

Susie maintains this amazing, delicate balance of keeping her busy booth running smoothly, while happily chatting with any customer who will pause a moment to do so. She loves people, and is very welcoming and interested in your stories. In fact, she was so excited to hear about this blog, she gave us that week's tofu for free.

This is Lindsey, who is very chill and laid back, and knows her vegetables like the back of her hand. An off-hand remark about my tomato plants not producing well this year led to an enlightening discussion on how weather affects tomatoes. Which then led to a conversation about summer foods and how we both love Caprese salad, which was why I needed her tomatoes in the first place. She runs Grassroots Farm in Wisconsin.

Really — ask her anything about her vegetables, she knows the answer.

And no discussion of community is complete without Brady. He is, in essence, the social hub of the farmers' market. Did you know about the new vendor selling amazing flavored syrups this year? Brady knows. Need a contact for an interview? Brady can hook you up. Need dinner ideas? Brady can casually come up with flavor combinations that I never would have dreamed of — I think he was the first one to turn me on to chocolate basil ice cream.

Brady's wares are another delicious Food in my Food "cheat." All-natural, locally-sourced baked goods keep me well-fed at breakfast when I've run out of time to bake my own. I look forward to Thursday morning breakfast entirely because I've got some BTrue muffins or coffee cake waiting for me.

Long before Brady was the BTrue Baker, he was my hairdresser, which was how we met. And when I became sick, and no longer had hair to dress, he referred me to Look Good Feel Better, a program he happened to volunteer for. By now we have known each other for so long, through myriad life changes for both of us, that he certainly qualifies as one of my oldest friends.

Small communities are important. Particularly in an urban environment, it's so easy to become so lost in the sheer numbers of people that you become isolated. How many of you know the names of your next-door neighbors? People need connection with other people; it's food for the soul as much as Food in my Food is food for the body... and soul. Communities are where we make them; our friends, the farmers' market, even taking time to remember and indulge in the joys of cooking and eating a meal with someone else. Personal connection is vital to well-being; it's our responsibility to ourselves to seek out and create these communities.

Who are your communities?

Sunday, September 25, 2011

The Basics of Bread

Many of the procedures we invoke involve making our own bread. It's about time we let you know exactly what that entails. Bread is really easy to make — a far simpler process than most people think — and it doesn't take terribly long. We'll tell you how to make a basic boule (round bread) — in this case, specifically a Portuguese broa recipe. This is enough to give you a solid bread-baking foundation, and after you're comfortable with it you can work in some flair and whip up some egg-based challah bread or an oat-based multi-grain bread. All of it uses the same basic technique.

Equipment for baking bread


We bake our bread in a table-top convection oven, using half the ingredients recommended in the recipe found in Artisan Bread in Five Minutes a Day. If you're interested in baking bread frequently, I'd highly recommend picking up a copy on Amazon — it makes an excellent "bread bible".

The dough is mixed in a 3 quart container, which typically gives us two loaves to work with, or two half-loaves in the case of pan breads. We measure with a glass liquid measuring cup, a set of metal dry measuring cups in various sizes, and a set of linked measuring spoons. We'll stir the dough with a silicone spatula.

When we've mixed our dough and let it rise we'll cook it in the convection oven on a clay baking stone to distribute heat more evenly in the oven, and absorb moisture from the baking loaf. A lot of retailers and kitchen supply stores sell commercial baking stones for anywhere from $15 for a cheap quarter-inch thick stone, to $40 for a set of half-inch stones. Thicker stones will better withstand the repeated stress of heating and cooling; thinner stones will crack sooner rather than later.

Wanna know a secret? Baking stones are really just differently-marketed terra cotta tiles. You can pick them up from home improvement stores for around 50 cents to $2 for a 6-8" square half-inch thick tile. That's what we've been using, and it's served us well for six months now. A caveat: the floor tiles have to be seasoned before you use them.

To use the floor tiles as baking stones, first make sure that you get untreated tiles. They usually are, but since you are using them for food, under high heat, it's best to ask and confirm it before you bring them home.

Once home, wash the tiles thoroughly with dish soap and hot water to clean off any dust and dirt, and let them dry completely.  After that, take a paper towel and neutral-tasting vegetable oil, and rub the entire baking surface of the tile with the oil.  You'll need to do this in multiple coats, as the oil gets absorbed into the tile.  More is better than less, and keep rubbing it in, using a circular motion, until the surface is no longer shiny. Then place the oiled tiles into a cold oven, turn it on to 300 degrees, and bake for at least four hours.  Cool before moving them, although many people just store them in the oven, too.

The four basic foundations of bread (and corn meal)


Our basic boule bread uses very simple ingredients; the raw building blocks of bread, at its most basic, is just water, yeast, salt, and flour. For the broa, we'll need 1.5 cups of lukewarm water, a 3/4th tablespoon of yeast (one packet), 3/4th tablespoon of kosher salt, 3/4th cup of corn meal, and 2.5 cups of unbleached all-purpose flour. This will bake us two loaves, good for sandwiches or toasting or whatever it is you feel like using bread for.

Unlike other forms of cooking, baking is fairly precise. You don't want to seriously over- or under-measure ingredients. Flour, for example, measures very differently when freshly sifted than when it's packed. You want to make sure, when you're measuring the flour, not to pack it tightly as that will give you too much flour. On the other hand, bread — especially the "bread bible" recipes — is pretty forgiving. You want to end up with a fairly wet dough, but there's no need to be super-exacting.

Making bread dough


We fill our mixing cup full of water, microwave it until it's lukewarm (not hot!), and add the 3/4th tablespoon of yeast and the salt into it. If our recipe called for it, this is where we'd add other 'wet' ingredients — milk, vegetable oil and maple syrup for oat bread, an egg for challah, etc. We pour it into the plastic container we've been keeping our dough in and mix it up. You may have the traces of dough from previous mixings left in the container; this is totally fine and actually recommended as it acts as a sourdough starter.

To this mixture we add the flour and corn meal, and — in other recipes — other dry ingredients like wheat bran or rolled oats. We measure the dry ingredients simply by scooping it into the measuring cup (1-cup-measure or less so as not to over-measure) and leveling off with a butter knife. This isn't a kneaded bread — we just mix it all up until there aren't any dry spots of flour left and it all has a nice even consistency.

Let the bread rise


At this point the dough is left out to let it rise, for at least two hours, but basically until it stops and gets flat on top. The dough is covered, but don't make it airtight — there needs to be an airflow for the yeast to do its work. After it's risen, unless you plan on using it right away, refrigerate it (covered but not airtight) — the dough is easier to manipulate when it's colder.

Shaping and baking the bread


Boule is french for "ball", and that's the shape of the loaf we'll be making. When you're ready to get baking, grab yourself a double-fist-sized lump of dough. Dusting it (and your hands) with flour will make it less likely to stick to your hands while you shape it. What you want to do is basically stretch and fold it in your hands, turning it a quarter-turn and then doing it again, until you've made four folds and turned it in a complete rotation. This develops the "gluten cloak" and will give you a round lump of dough.

After shaping the bread you'll want to let it sit out for 40 minutes on a cornmeal-covered pizza peel. At the 20 minute mark you want to preheat your oven — with the stone on the rack and an empty broiler tray on a different rack — for the latter 20 minutes.


Baking your bread

 
Immediately prior to putting the dough in the oven you'll want to score the top with a sharp knife to allow for the bread to rise as it bakes. With practice, you can perfect the sharp forward-backward shake of the pizza peel to drop the loaf from the peel to the baking stone; until then, you can also shove it off the peel with a spatula. Pour a cup of hot water into the heated broiler tray just before closing the oven. This will create steam that gives you the crispy crust of artisan breads, while the inside remains moist and soft.

This particular broa will bake for about 30 minutes, until deeply brown with a firm crust. All bread recipes will follow this basic pattern, and once you have the confidence to follow it you can really bake just about anything.


Wednesday, September 21, 2011

Caprese Salad

Every season has dishes associated with it, like pumpkin pie in the autumn or eggnog in the winter. As we come out of summer and into the fall, we reflect on one of summer's dishes — caprese salad.

Insalata Caprese, "salad in the style of Capri" is simple, much like the summers of our youth were simple. At its core it's just tomato, fresh basil, and fresh mozzarella cheese, sliced and served raw. The presentation of the salad is the important part, and each individual unit of caprese can be devoured whole.

The tomatoes we used were garden fresh — some from my parents' garden in the suburbs, and some that we purchased at the farmers' market. Kat grows her own cherry tomatoes, and they come sweet and perfect off the vine, a natural candy that's ideal for other sorts of salad, but not quite the right size for what we were going for here.


The mozzarella cheese we used was from Trader Joe's, and it was tender and soft. The basil was from Kat's garden. The dressing was just extra virgin olive oil, also from Trader Joe's.

The tomatoes were sliced into discs, the cheese sliced atop it, then a leaf of basil was added as a crown. We arranged the entire plate ingredient by ingredient, drizzled the oil along the top, then ground sea salt and rainbow peppercorns over all. Just like that, our caprese salad was ready to eat.


What'd it taste like? Fresh. Stark. Cool. A great summer food for a great summer.

Tastes like summer.

Monday, September 12, 2011

Tofu Noodle Salad

Tofu noodles from Phoenix Bean are just great. Made fresh shortly before we bought them at the Farmer's Market, they make a great snack food right out of the bag and can be used in almost any way that noodle pastas are. We decided to make a salad out of them.


Preparation

The noodles are fairly long, so we cut them up into manageable lengths before using them. One package was enough to make our salad, and we also chopped up a cucumber, tomato, and a bunch of mushrooms. We went ahead and shredded a golden beet to add some sweetness to the mix.

To balance that out, our dressing was an eighth of a cup of olive oil and an eighth of a cup of spicy vinegar, handcrafted by Ruby Sara. The vinegar was really amazing, infused with ginger root, turmeric, and cayenne pepper. Into the dressing base we added crumbled goat cheese and mixed the whole concoction together until it was nice and creamy.

When we were ready to eat our salad we drizzled it with the dressing we'd made, tossed it all together with a little sea salt, and topped the whole thing with crumbled sweet potato tortilla chips for some added crunch and texture.

The Results

Our tofu noodle salad turned out spectacularly, with a spicy southwestern tang to it. The noodles were tender and moist, and the handcrafted vinegar made for an excellent dressing. None of the ingredients were very expensive or hard to acquire, and the results were decadent bordering on guilt — I can't help but think that I'm not well off enough to eat so well!

Thursday, September 8, 2011

Rhubarb Sauce

Can you believe that until last year, I'd never even tasted rhubarb? I was only vaguely aware of the vegetable's existence at all. It was just another quaint sounding food with a funny name, like arugula or rutabagas. When I found out that my parents had some in their garden, I took it upon myself to give a new food a try.

The stalks were harvested from the garden, and the toxic leaves stripped from them. I took five long stalks without any clear idea of what we'd do with them right away, and I wanted to have enough to experiment with. Kat had a recipe for a rhubarb sauce, and we had some ice cream in the freezer, so our course was clear.


Process

Chopping up two stalks to give us the two-and-a-half cups the sauce called for is virtually all the prep work the sauce requires.  We added to this 1/3 cup of pure organic maple syrup purchased from McCluskey Brothers farms, and a quarter-cup of lemon juice.

The mixture was simmered low and slow until the rhubarb was soft, then mashed into a sauce. We spot-checked it for sweetness, adding more syrup as desired. After it was done, we spooned it over vanilla ice cream.

Outcome

Rhubarb has an interesting taste, sweet with a hint of tart. The sauce we created would have gone just as well over pound cake or basically anything else you want to drizzle it over.

Thursday, September 1, 2011

Thai Curry Vegetable and Tofu Stir-Fry

Michael is convinced that I'm this excellent cook. But the reality is, the majority of my cooking consists of "dump in pot, heat, flavor, hope for the best." The "flavor" part is often where things go awry; I'm getting a little better at it, so currently it's about a 50-50 shot whether it is awesome or flavorless.

Anyway, the point is, cooking doesn't have to be elaborate or complicated, and often the "dump in a pot" method works out quite well.  Simple can be great.  And this is all stir-fry really is.  The method is uncomplicated: cut everything up, throw it in a large pan with some olive oil, add the sauce at the end.

It's really the ingredients that make something like this special. Sometimes you can find fun and unusual things at the farmers' market.  Sometimes you just need to get rid of that zucchini, because what else can you do with a zucchini? It's also a good way to use up whatever is sitting in the fridge needing to be used up.  So.

Yes, these beans are purple. I get them from my friend Vera from Videnovich Farms. They are called Purple "Velour" Filet Beans. I have no idea what that means, but I like them because they are goth beans.

The fun thing about these is that they turn green when you cook them. I also got that hot banana pepper from Vera. I only used half because they're a bit more powerful than jalapeƱos.


The tofu is from Phoenix Bean, which is located approximately spitting distance from their booth at the market. They have a whole variety of tofu products, including this stuff which is pre-fried and makes this whole stir-fry thing a lot easier. I'm not sure I could actually get that nice browning myself.

The Thai curry sauce is from Trader Joe's. Someday I may feel up to concocting such sauce myself. In the meantime, TJ's is my favorite "cheat," because they're cheap, good, and their philosophy is largely the same as mine: if it's not food then it shouldn't be in food.


Here's that "dump in the pot and heat" part of the recipe. It's soooo harrrd.

This is zucchini, green onion, banana pepper, and the beans. Note the purple beans gradually turning green.

The tofu I cubed and added in a little later once the beans were mostly cooked.


And here's the "flavor" part. Luckily we're not relying on me for this. Thank you Trader Joe's.

I used about half the bottle for this. There's a lot of food in there.


Finis. Also, YUM. Mix with brown rice and away you go.

The nice thing about this is you can have near-endless variations, depending on what you find at the farmers' market.


Who knew beets came in golden?


Yes, these beans are flat, and white with purple speckles. More from Vera; they're called, appropriately enough, Dragon Tongue beans.

Once again, the purple goes away when you cook them. They end up a middling cream color.


Here we have fried tofu, golden beet, Dragon Tongue beans, green bell pepper, and the last half of the banana pepper.

YUM.